Bank Transfer Casino

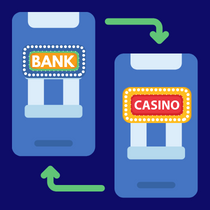
Bank transfer is a well-known payment method that most people have used several times in one way or another. Playing at an online casino with a bank transfer simply means transferring money directly from your own bank account to the casino’s bank account often with the help of bank However,this Payment method is gradually being outperformed by Trustly, which allows you to make bank transfers in a much smoother way. Let`s take a closer look at how playing ata casino with bank transfer is done.

about

Common casinos with bank transfer

Casino Days

18+ | T&C applies.

  • Offers Online Casino & Sports Betting
  • Over 2000 games to choose from
  • Great deposit options
Casino Friday

18+ | T&C applies.

  • 4/5
  • Book of dead
  • $1.100 Bonus Package
  • 375 Extra Spins
Club Riches

18+ | T&C applies.

  • 4/5
  • Good Selection of Live Casino games
  • Fast & secure withdrawals
  • 24/7 Premium customer support
Fire Vegas

18+ | T&C applies.

  • 5/5
  • Massive bonus package
  • Responsive 24/7 support
  • Mobile friendly site
Hell Spin Casino

18+ | T&C applies.

  • 4/5
  • Ongoing tournaments
  • Terrific horror theme
  • Fantastic VIP Program
Jack Win

18+ | T&C applies.

  • A variety of deposit & withdrawal methods
  • On going tournaments
  • 20% cashback

Navigate to the Plugins Page

In WordPress, you can easily deactivate plugins through the WordPress admin dashboard. Here’s a step-by-step guide on how to deactivate a plugin:

  1. Login to your WordPress Admin Dashboard:
    • Open your web browser.
    • Enter your WordPress site’s URL followed by “/wp-admin” (e.g., http://yoursite.com/wp-admin).
    • Enter your username and password to log in.
  2. Navigate to the Plugins Page:
    • In the WordPress admin dashboard, locate and click on “Plugins” in the left-hand menu.
  3. Deactivate the Plugin:
    • Find the plugin you want to deactivate from the list of installed plugins.
    • You will see the plugin name, a brief description, and options such as “Activate” or “Deactivate” below the plugin name.
    • Click the “Deactivate” link.
  4. Confirm Deactivation (if prompted):
    • Some plugins may ask for confirmation before deactivation. If a confirmation pop-up appears, click “Yes” or “OK” to confirm the deactivation.
  5. Verify Deactivation:
    • Once deactivated, the plugin’s status should change to “Inactive.”
    • You may see a notification confirming that the plugin has been deactivated.

That’s it! The selected plugin is now deactivated, and its functionalities are temporarily disabled.

If you want to set a plugin to not activate automatically when WordPress loads, you can’t achieve this through the standard WordPress admin interface. In such cases, you may need to resort to more advanced methods, such as:

  1. Rename the Plugin Folder:
    • Connect to your website using an FTP client or file manager.
    • Navigate to the wp-content/plugins/ directory.
    • Locate the folder of the plugin you want to deactivate.
    • Rename the folder by adding something like “disabled” to its name.
    • This will prevent WordPress from loading the plugin.
  2. Use a Must-Use Plugin:
    • Create a file with a .php extension in the wp-content/mu-plugins/ directory.
    • Add code to the file to disable the plugin. For example: